Mobile Messages
Contents
Mobile helps you engage your mobile app users with rich and creative messages.
Create Push Notifications or In-App Messages, and allow users to browse past messages in your In-App Message Stream.
See Setup In-App Messaging for the developer documentation| Push Notifications | In-App Messages | In-App Message Stream |
|---|---|---|
 Sent to users' mobile devices, even if your app isn't open.A push notification can be a simple message directing users to your app, or can drive to an in-app message when the push is tapped.
 |
 The most impactful way to engage your users while they are using your app.In-App Messages are commonly displayed as a "roll-down" interface and can be triggered at key moments, such as the user opening the app.
 |
 A list of historical cards integrated directly into the app. This is a great way for users to look back over the messages that you have sent to them in the past.Users can access the stream via the "Messages" icon which is integrated into the app, or tapping 'View all Messages' on an In-App Message.
 |
Creating and Publishing Messages
Whether you want to publish just an In-App Message, just a Push Notification, or both in conjunction, start by clicking Messages in the Mobile navigation menu. Click Create New at the top of the page. You will have the option to create either a Regular Message or an Automated Message.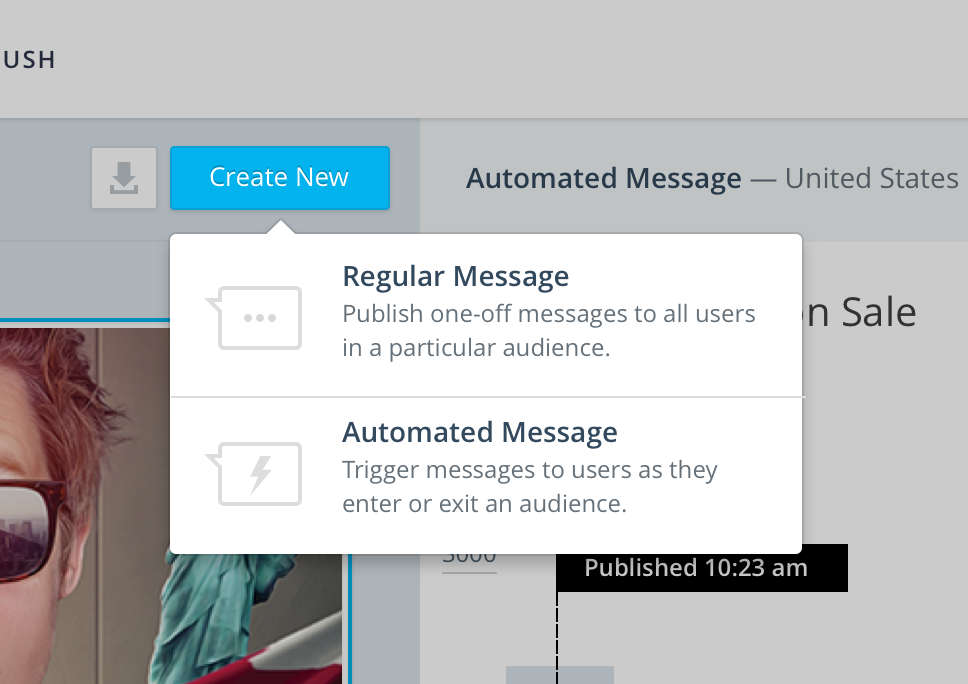
- Regular Messages Publish messages to all users who are currently in an audience. Regular messages can be sent immediately or scheduled for a future date. Some common uses are to send announcements, breaking news, or deals.
- Automated Messages Targeted and personalized messages that are triggered as a result of a user entering or exiting an audience. Automated messages allow you to trigger messages dynamically as user behaviors change. Examples include:
- Automatically triggering a notification to incentivize a user who hasn't used the app for a period of time.
- Sending a notification with contextual information as a user enters or exits a geographical region.
- A welcome notification for a user a few days after installing.
- With Automated Messages, an additional option is available to send the message to all current members of the audience, like a Regular Message, and then also to all users who enter the audience in the future, as they enter.
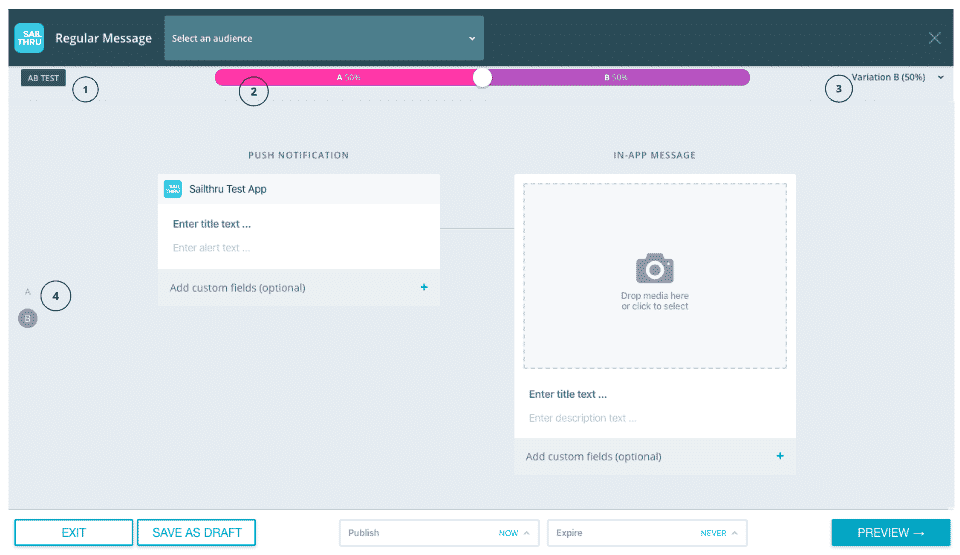
Message Compose Screen
In the Messages section of the interface, click Create New. Then, select a message type--Regular or Automated. The Message Compose screen opens. Key Elements of the Message Compose Screen
- Audience targeting options
- Push Notification content
- In-App Message content
- Scheduling options
- Message Preview button
- AB Testing Menu (see Mobile AB Testing)
- Test Message button Note: The Test Message button will send your message to your selected audience immediately. Until you're ready for your final send, only attach a test audience to your messaging.
Audience Targeting Options
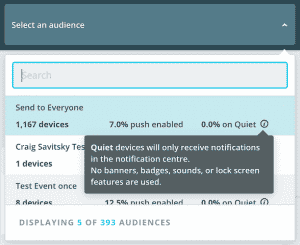
When creating a message, you will choose users to target based on audience segments that you have previously defined. Audiences can be created in the Audiences section. The first thing to do is select your target audience from the Select an audience menu on the top bar. When you open the menu, you'll see that each audience shows the number of users, how many are push enabled, and how many of the enabled users are set to Quiet.
For Automated Messages, you also need to select a trigger type from the adjacent menu. You can choose from the following options:
- Send on Audience Entry - Publish to users as they enter the selected audience.
- Send on Audience Entry and to Current Audience - Publish immediately to all users who are currently in the selected audience (as with a Regular Message), and also to additional user who enter this audience in the future, as they enter.
- Send on Audience Exit - Publish to users as they exit the selected audience.
Push Limits for Automated Messages
With Automated Messages, you also have frequency capping options under the Push Limits drop-down to limit the number of push notifications that are sent to any single user. This ensures that users are not spammed.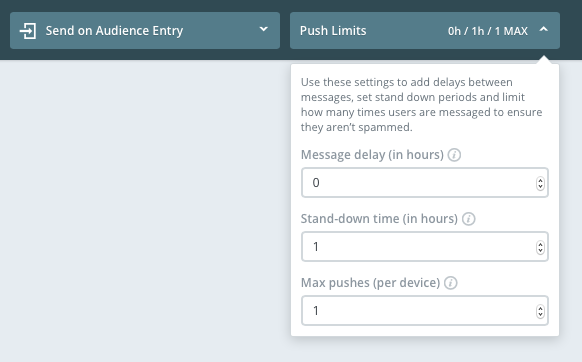
- Delay the push notification up to 24 hours after the device enters an audience. When the delay period expires, the message will be sent.
- Specify a stand-down period of up to 24 hours after the initial push has been sent. During the stand-down period, messages are not saved to be sent when the period expires, but are skipped. Essentially, "don't send more than 1 push notification per hour or X hours per device".
- Limit the maximum number of push notifications that a device may receive with this message.
Creating Content
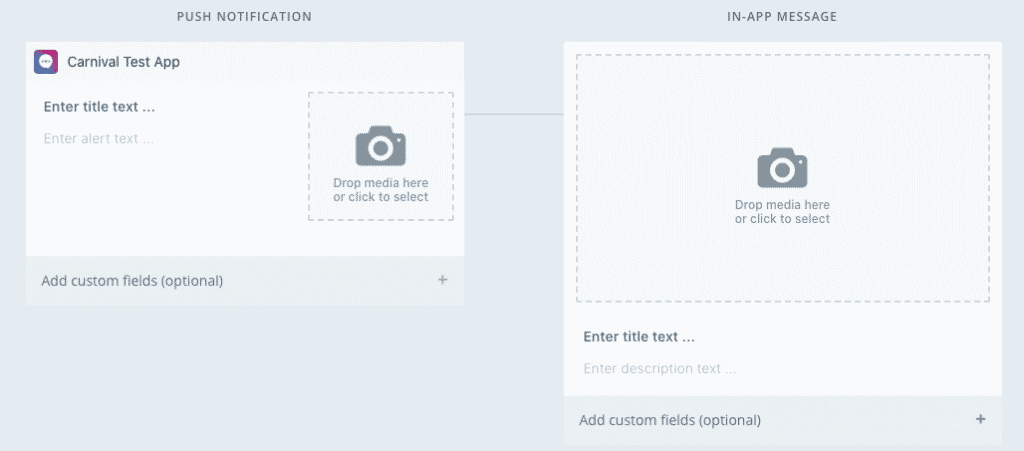
The most common messaging use case in the Mobile platform is sending a Push Notification which links to an In-App Message. This drives users to open your app, and when tapped, links to a message with more content. For this reason, the default layout of the composer opens with a Push Notification linked to an In-App Message.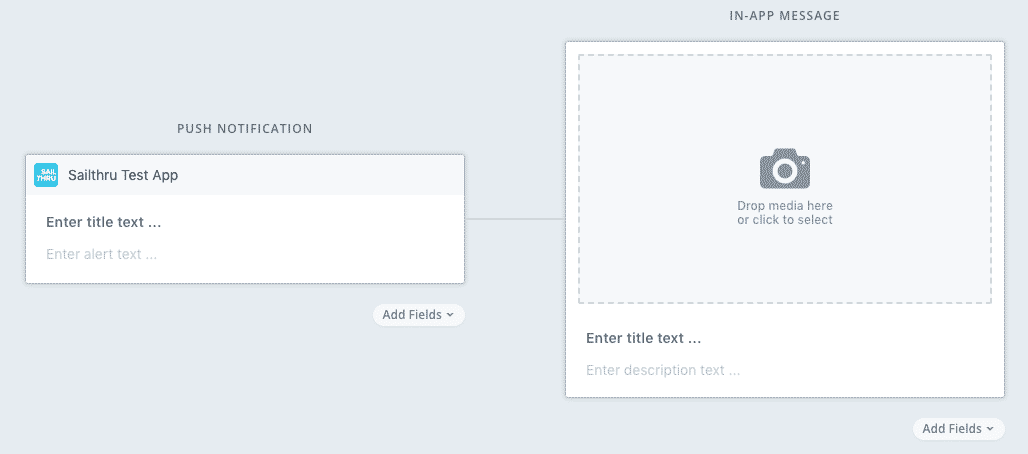
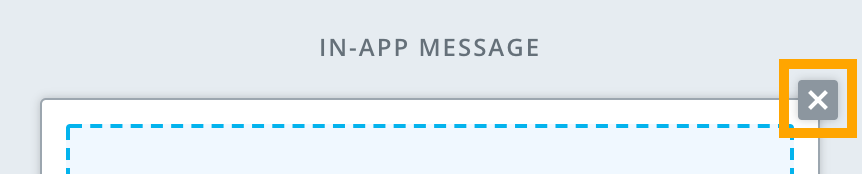
There are times where marketers may want to send only a Push Notification or only an In-App Message. If this is the case, you can hover over the unneeded Push Notification or In-App Message and press "x" in the top-right corner to remove it.
Push Notification Content
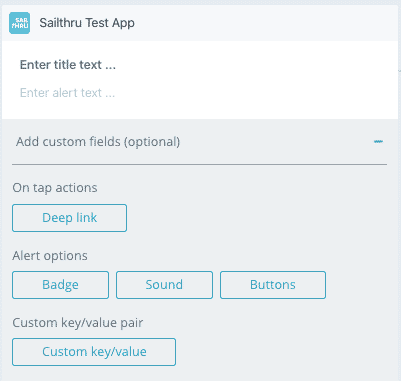
Push Notifications contain text-only information which will show on screen even if the user does not have the app open. Note: Notification titles are supported on all iOS devices. Notification titles on Android devices are supported from v5.7.0 and up. You can also add extra fields such as a badge, sound, category or Custom Key/Value by clicking Add fields.- A Badge will show a small number on the app icon on iOS, which is usually used to indicate to the user that there is new items to view. For example, you would enter 1 in this field to indicate 'one new message'.
- If your app contains custom notification sounds, you can enter a Sound file name to determine which sound should accompany this message.
- A Button can be added to allow users to interact directly with your app.
- To enter custom data that your app has been programmed to use or display, select Custom key/value.
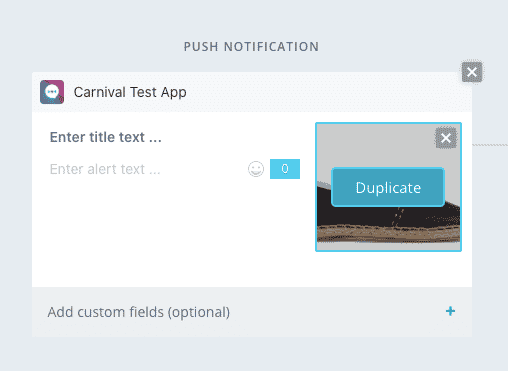
Rich Push Notifications
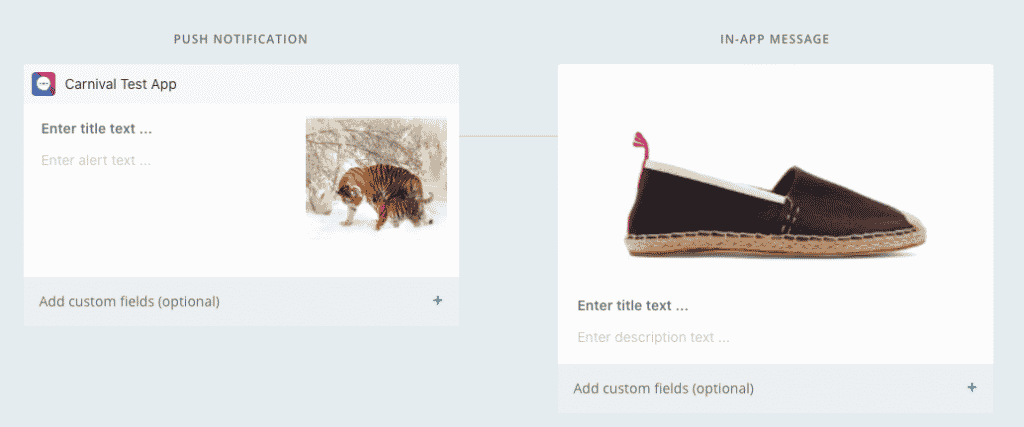
Rich push notifications allow you to add separate media files to your push notifications. You can:- Send a push notification which includes an image/gif/video without sending an in-app message.
- Send a push notification which contains a different image/gif/video to the one included in a linked in-app message.
- Reuse images/gifs/videos between push notifications and in-app messages.
The push notification and the in app message appear linked when you create a new message. When you add a media file to either message, it will appear with an overlay button allowing you to duplicate the image to the other.
Or you can use two separate media files:
Self-hosted Images
Mobile supports self-hosted images in your push notification. Use a custom key/value pair with one of the following keys and the self-hosted url as the value. Self-hosted images (image_url) and video content (video_url) must be added through the API.
| Image Type | Key | Value |
| Deeplink | _u |
self-hosted url |
In-App Message Content
Mobile's In-App Messages allow you to send a wide range of content to your users. You can send videos, images, and links, and add Message Attribute fields that have been custom-configured for your app's interface.- To add a video or image, drag the file into the gray box or click the camera icon to locate a file on your computer.
- To add a link, click Add fields, select Link, and then enter the URL.
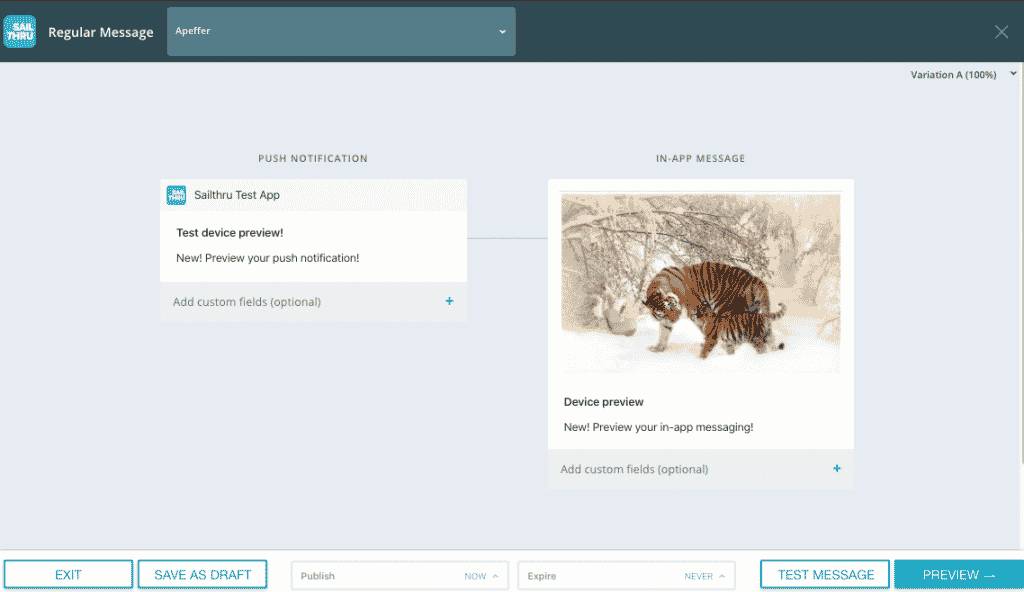
Mobile Device Preview
Preview push notification and in-app message content across display states for Apple or Android devices. The preview screen will give you an overview of your notifications and In-App Message content, as well as any extra fields you have added such as alert, sound, default buttons, or custom key/values.- To preview your message content, select Preview in the App Footer Bar.
- When the Device preview screen opens, the Apple Platform, iPhone X, and Lock (collapsed) are selected for the preview. Buttons will only show in the device preview when Lock (expanded) is selected.
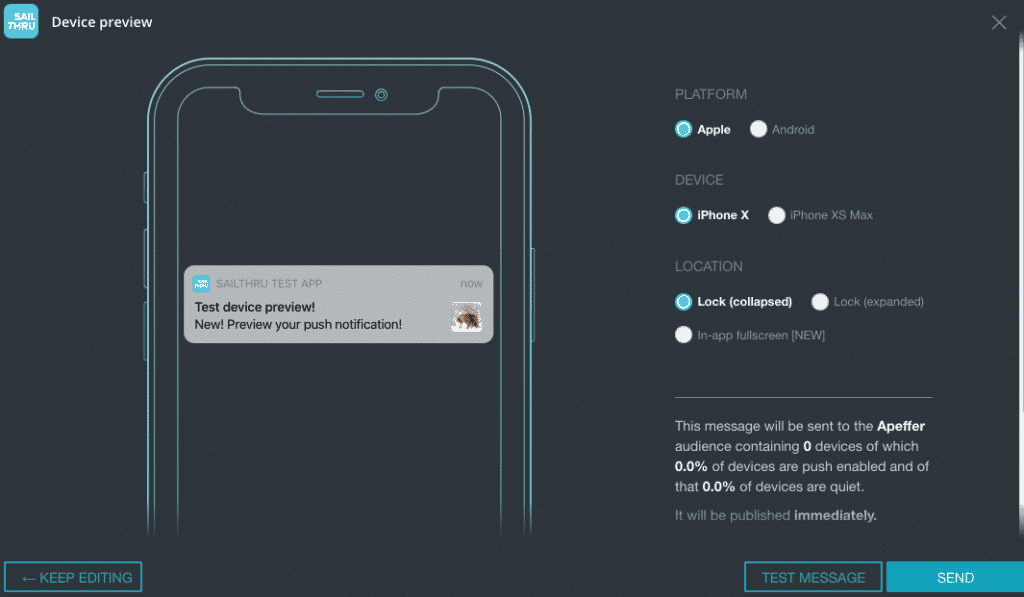
- Change the settings to configure the correct platform, device, and location for your preview.
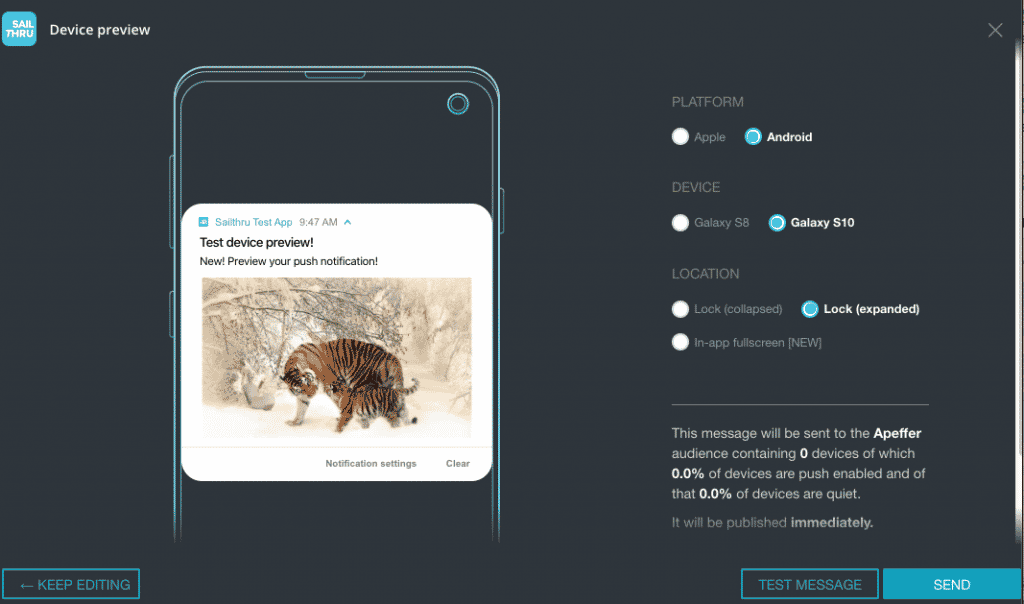
- From the Device preview screen, you can go back to continue editing, send a test message, or send your message immediately.
Scheduling Options
If you want your messages to begin sending immediately on publish, skip this step. Otherwise, to schedule your messages, click the Publish field at the bottom of the interface.
Measuring Your Message Success

Measuring the performance of your messaging campaign is critical for understanding and comparing the effectiveness of your campaign. On this screen you are easily able to access:
- Message Impressions - How many opportunities users have had to view your content.
- Message Tap-Throughs - How many times the content has been viewed by your users.
- Size of Audience - An estimate into how many users could see this message.
- Push Notification Count - How many users the push notification went out to.
Download Message Analytics
You can download all your message analytics, the analytics for a specific date range, or the analytics for a single message as a CSV file.Download all message analytics
Download all your message analytics with one click. To get your CSV file, click the download button above your Messages list.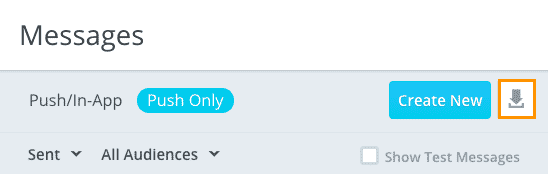
Download analytics for a specific date range
Download the message analytics for a specific date range in a few steps. To get your CSV file, select All Time to open Filter by Date.
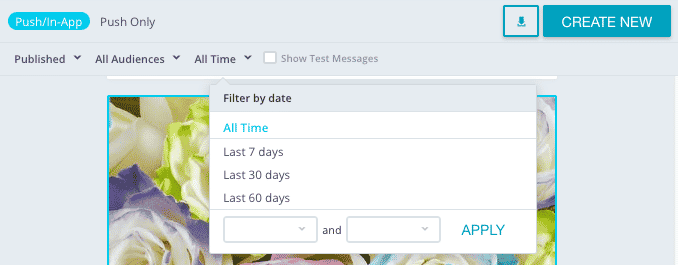
Select one of the existing filters or select your own date range.
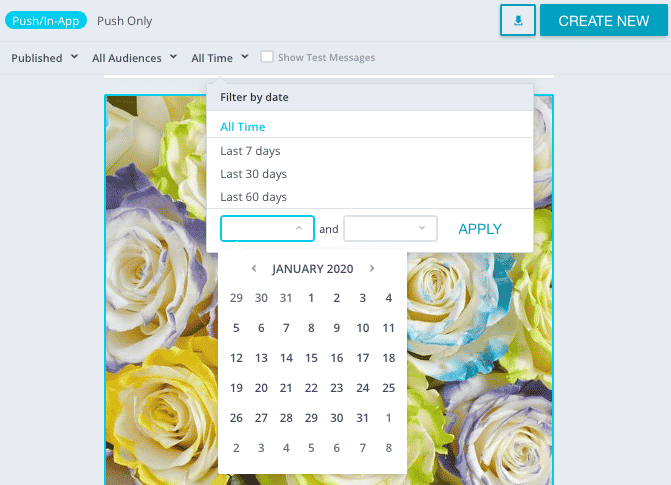
Select Apply to show messages from the selected date range. To download your file, click the download button ![]() above your messages list.
above your messages list.
Download analytics for a single message
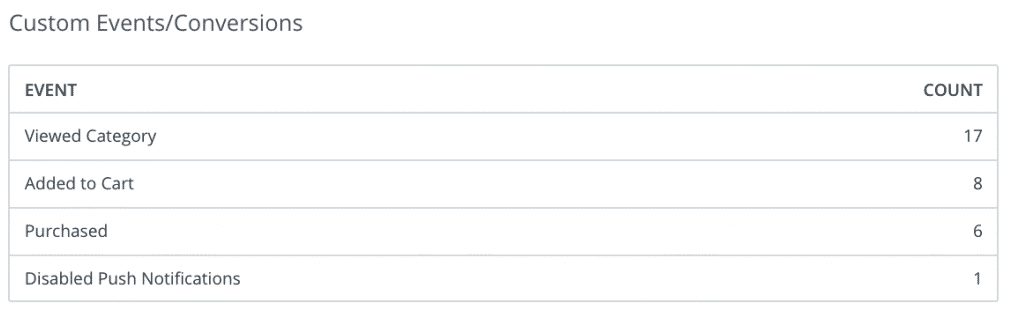
- Select a message from the Messages list to display the performance analytics.
- Locate the Event Conversions table and select the star next to the events you'd like to include.
- Click the download button
 , located in the title bar of the message analytics screen, to download your CSV file.
Mobile AB Testing
To maximize the response to your messages, you can create and test multiple variations of your push notification or in-app message content for any Regular (Non-Automated) Message.
Key Elements of AB Testing in the Messaging Interface
- AB Testing toolbar
- Distribution slider
- Variation menu
- Variation tabs
Creating an AB Test Message
- When creating a new message in the Message Composer, at the top-right, click the arrow next to the default Variation A, and click Add a Variation.

- The Message composer will switch into AB testing mode and display an AB testing toolbar as shown above. Your browser will scroll down to a second variation of your content, Variation B. If you have already entered content in Variation A, it is duplicated in Variation B, where you can easily edit the push notification and/or in-app message content for this variation.
- You can create additional variations, up to a total of five. At the left edge of the display, click a variation letter to jump back to it.
- To determine the proportion of your audience that will be randomly selected to receive each variation, use the AB distribution slider at the top of the window.

- Select an Audience. By default all members of the audience will receive one of the test messages. To isolate the test to a subset of an audience, you can use AB Test Groups.
- Set your Publish and Expire settings.
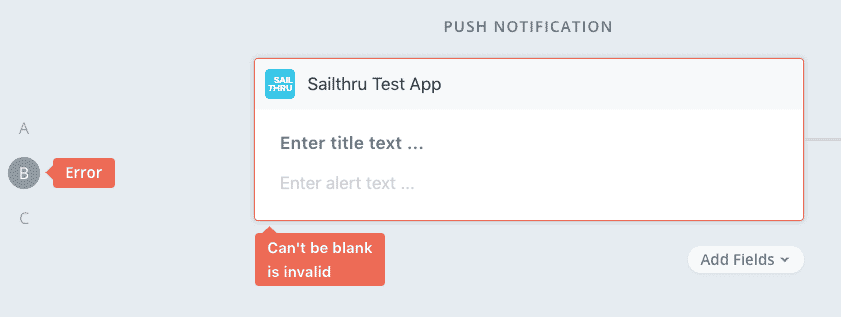
- Click Preview. If any required message fields are not completed, an alert will be displayed on the variation letter at the left edge, and on any applicable field within the variation.
- Once your preview is displayed, click Publish when you are ready to send or schedule the message.
Comparing AB Test Messages
When an AB test message is published it will appear in the messages stream with a small AB icon on the message card. You can switch between each linked variation in the top right hand panel to see which one was the most successful. To compare messages you can check the opens, impressions and event conversions between message variations as per a regular message.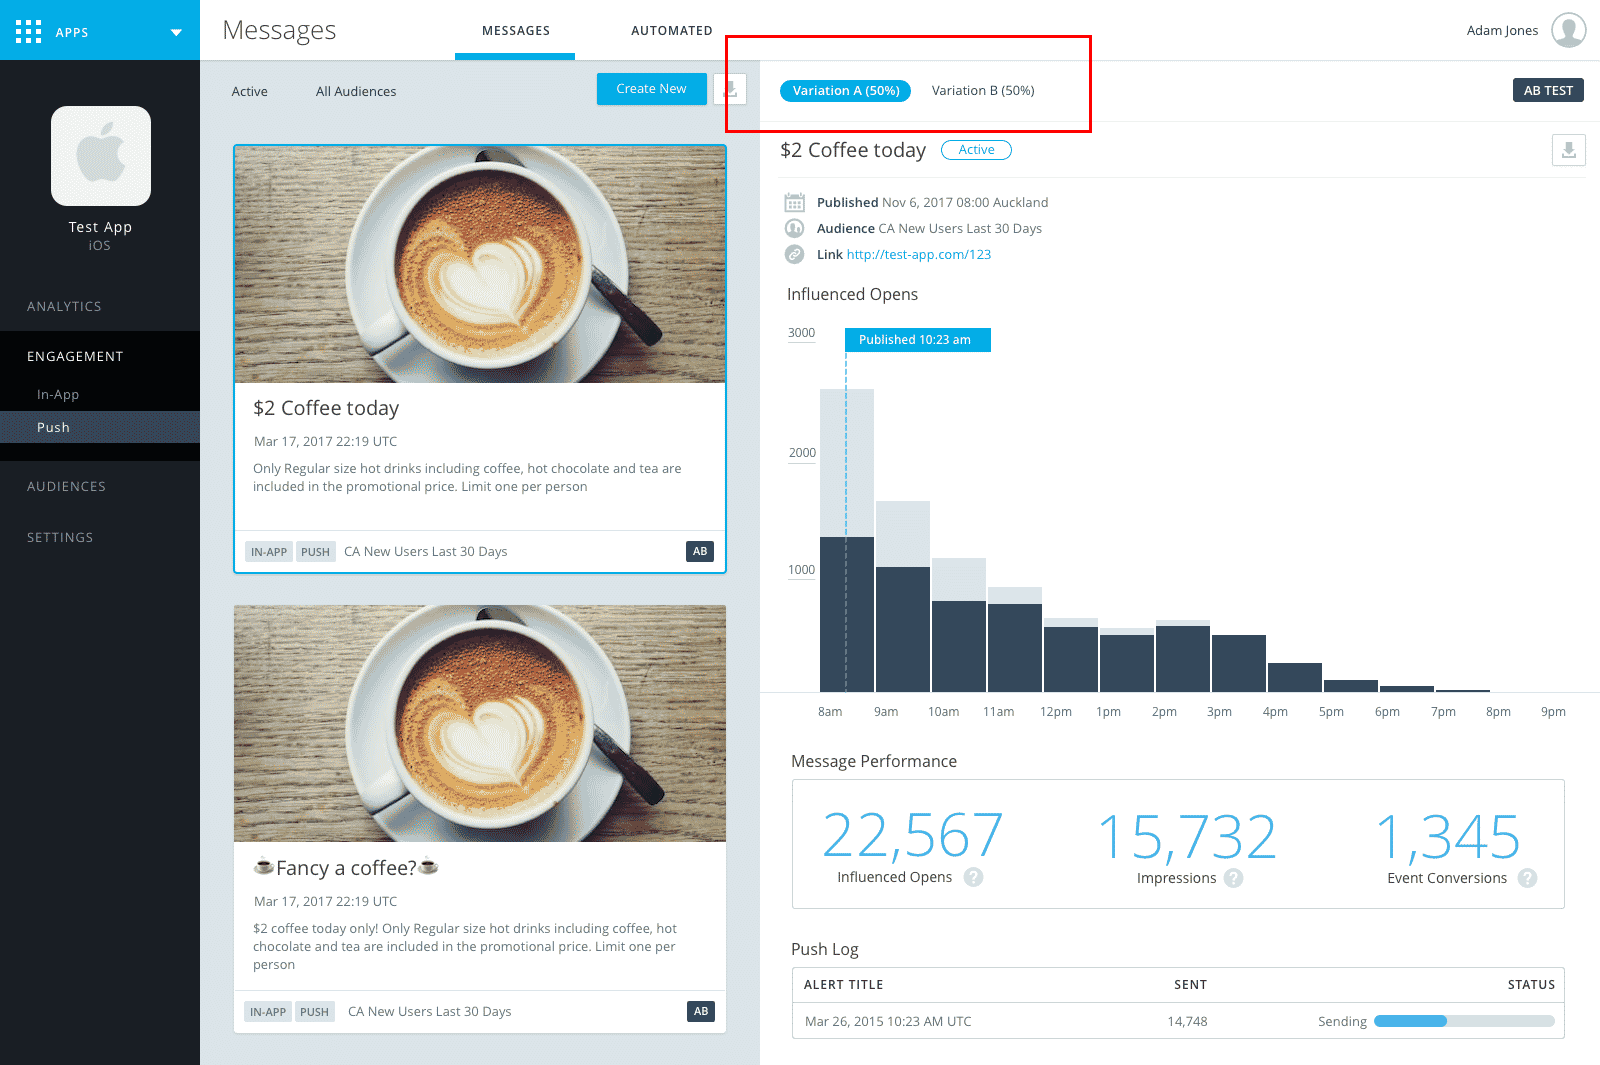
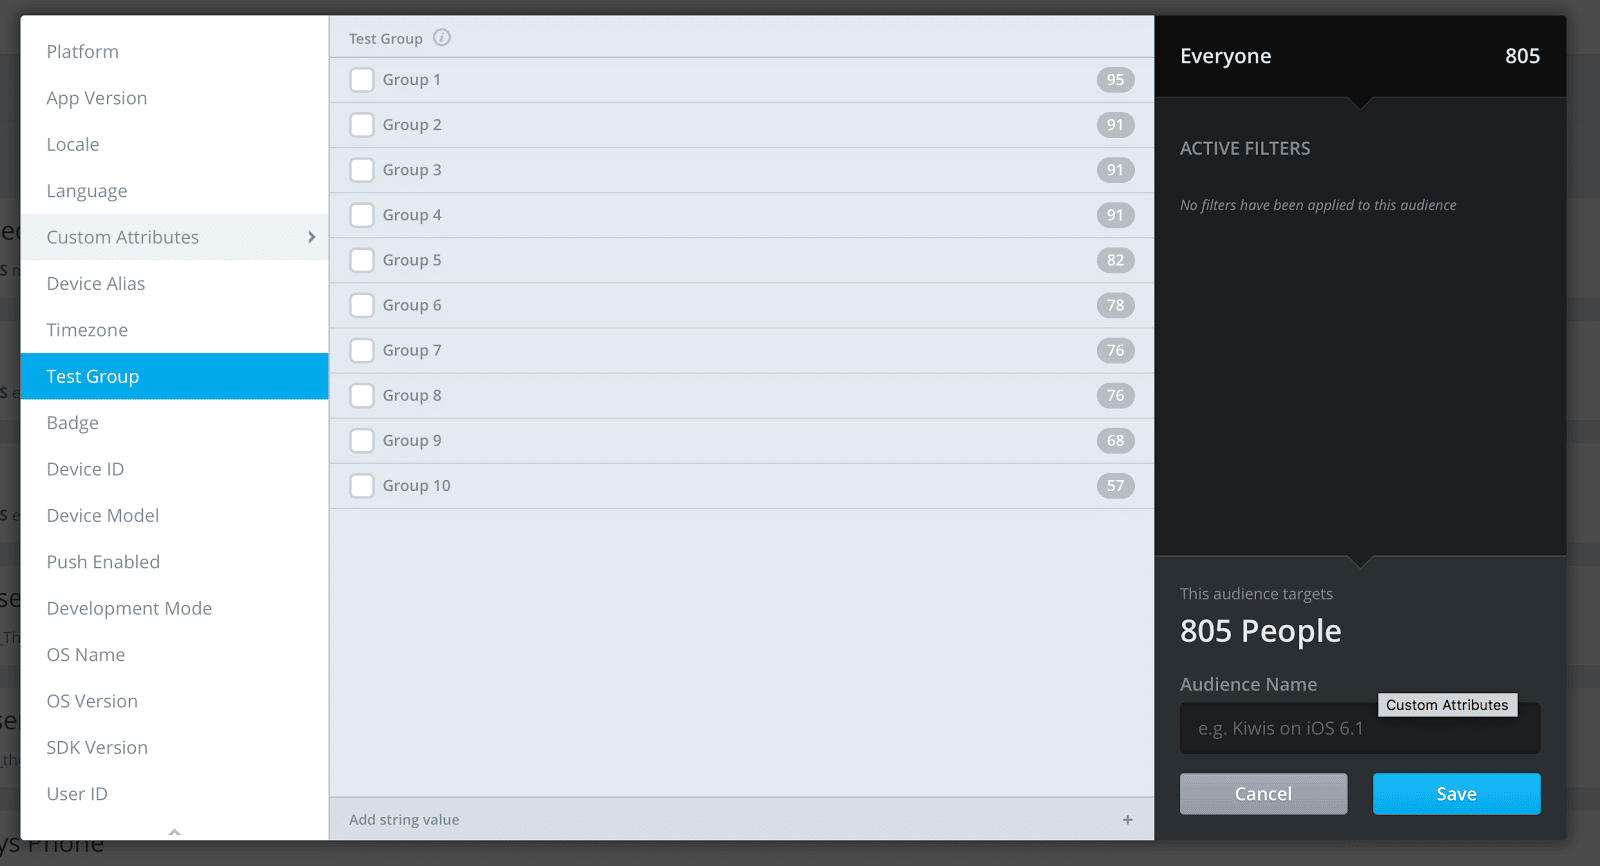
Test Groups
AB Testing is a great way to test multiple versions of your messages across your entire audience, however sometimes you may want to exclude some of your audience as a holdout group and only perform the test on some of your users. For example, you may want to perform a test with different variations on 10% of your user base and then proceed to message the remaining 90% with the best performing content. To do this, Mobile allows you to set up Test Groups in the audience builder. Test groups are pre-generated deciles of your user base, labeled Group 1-10, that remain consistent for each user. For example, to run an AB test on 10% of your users, you could:- Use the audience builder to create an audience with Test Group "Group 1" selected. There are 10 test groups, so selecting one will select 10% of your users. You can choose to further restrict the audience using other criteria, like language or locale.
- Create your AB test messages and send them to this new audience.
- Send the best copy to users who are part of A/B Test Groups '2-10' as well as any of the additional attributes you selected in step 1.